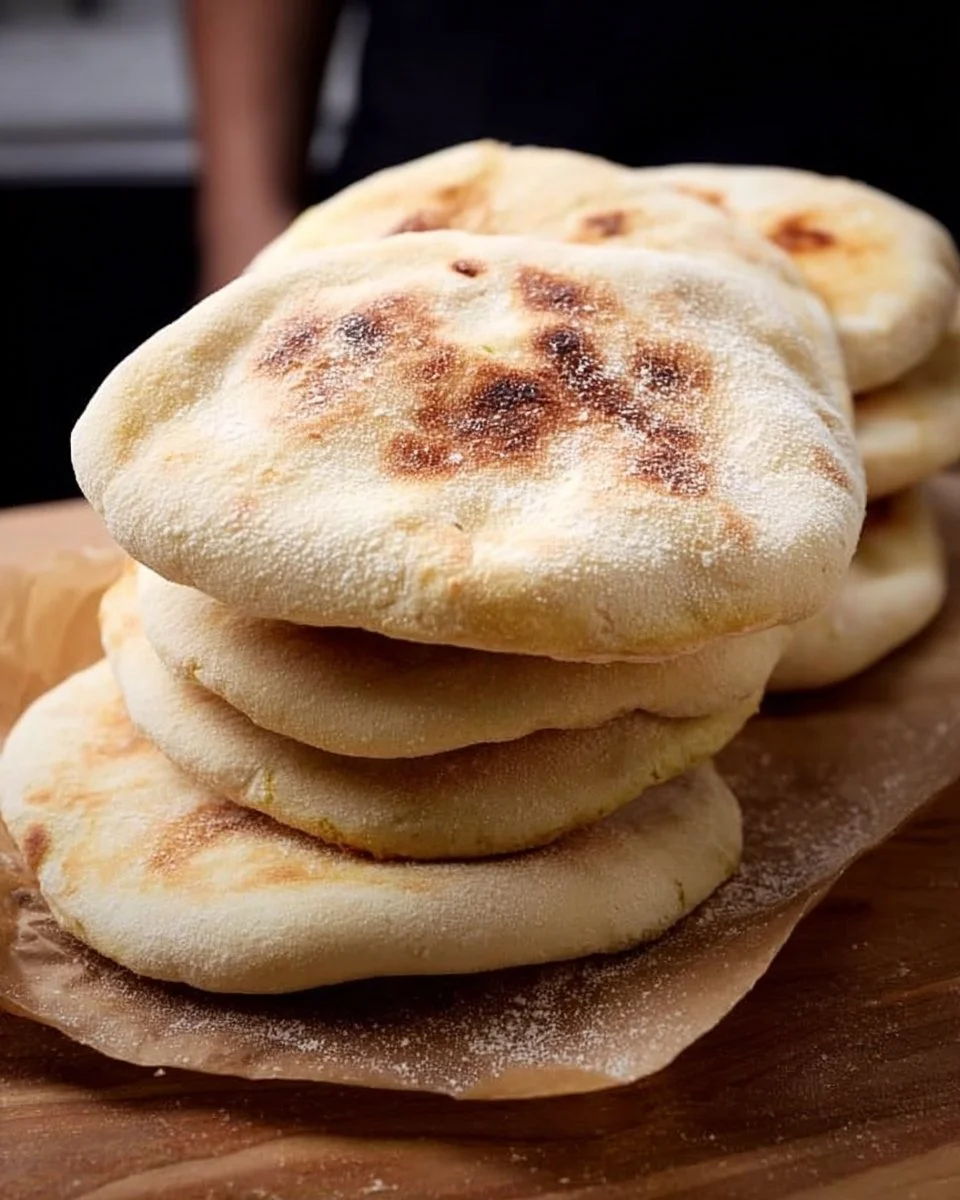
There’s something truly special about homemade Pita Bread. The moment they puff up in the oven, they transform into these delightful, airy pockets, perfectly golden and slightly chewy. Each bite is a warm embrace, with that lovely, subtle nuttiness seeping through. I often find myself whipping these up as a comforting weekend project, filling my kitchen with a heavenly aroma.
Making Pita Bread comes together surprisingly fast, and it’s a perfect addition to any meal. Whether you’re stuffing them with grilled vegetables, soaking up a rich dip like hummus, or enjoying them as a simple companion to soups, these little wonders never disappoint. And the leftovers? They’re just as fabulous! You can toss them in the fridge and savor them for a few days, or freeze them for a rainy day.
Why I Love Pita Bread
Pita Bread truly hits that sweet spot between easy and delicious. The flavor profile is incredibly versatile; you can use it as a base for Mediterranean delights or as a quick snack with dips. Plus, there’s an elegance to freshly baked bread that just elevates any gathering, making it a true winner at my table!
Pita Bread Ingredients
The magic of this Pita Bread truly lies in the harmony of simple ingredients. This bread might seem straightforward, but each component plays a vital role in achieving the perfect puff and texture. Don’t worry about exact measurements just yet; those are all in the recipe card for you!
Essential Components
- 3⅓ CUPS ALL-PURPOSE FLOUR: The backbone of our pita, this flour brings structure and chewiness to the bread.
- 1¼ CUPS LUKEWARM WATER: This helps activate the yeast, creating that beautiful rise we’re aiming for!
- 2 TEASPOONS ACTIVE DRY YEAST (OR INSTANT DRY YEAST): These little guys are the star performers, giving our pita that airy texture.
- 2 TEASPOONS SUGAR: A touch of sweetness that feeds the yeast, allowing it to do its job!
- 2 TEASPOONS SALT: Essential for flavor, it elevates all of the other ingredients and balances the dough.
- 2 TABLESPOONS OLIVE OIL: This helps to keep our pita soft and adds a lovely richness to the flavor.
Need a Swap?
Want to switch things up? If you find yourself out of all-purpose flour, you can experiment with whole wheat flour (though it won’t be quite as light and fluffy). For a gluten-free option, try a gluten-free flour blend, but adjust the liquid slightly, as some blends absorb more moisture. Feeling adventurous? Add a sprinkle of za’atar or garlic powder to the dough for an extra layer of flavor.
Kitchen Tools You’ll Need
- Mixing bowl (large enough for dough to rise)
- Whisk
- Rolling pin
- Baking sheet or pizza stone
- Clean kitchen towel (for covering the dough)
- Parchment paper (optional)
How to Make Pita Bread
Let’s dive into creating this wonderfully soft Pita Bread. I’ve broken down the process into simple steps. Follow along, and you’ll have a delicious meal in no time. We’re aiming for puffy, perfect pockets that you can fill with your favorite goodies!
Mix the Dough Together
Start by combining the active dry yeast and sugar in the lukewarm water. Allow it to sit for about 5 minutes until it’s frothy—this means your yeast is alive and kicking! In a large bowl, combine the flour and salt, and make a well in the center. Pour in the yeast mixture and the olive oil, then stir until it forms a shaggy dough.
Knead to Perfection
Transfer the dough onto a lightly floured surface and knead it for about 8-10 minutes until you have a smooth and elastic ball. This step is key! If the dough feels sticky, don’t hesitate to add a sprinkle of flour as needed. Once you’re done, place it in a greased bowl, cover it with a damp kitchen towel, and let it rest for about an hour or until it doubles in size.
Shape the Dough Balls
Once the dough has risen, punch it down gently to release the air. Divide it into 8 equal pieces, shaping each piece into a smooth ball. Cover them with the towel again to let them rest for 10 minutes; this makes it easier to roll them out.
Roll Them Out
Grab your rolling pin and roll each dough ball into a circle about ¼-inch thick. Make sure they’re evenly rolled out; this helps them puff beautifully in the oven. Place them on a baking sheet lined with parchment paper, spacing them out so they have room to expand.
Bake Until Puffed
Preheat your oven to 475°F (245°C) and place your baking sheet in the oven if it’s safe to do so. Bake the pitas for 5-7 minutes, or until they’ve puffed up and are lightly golden. Don’t worry if they don’t brown much—that puffiness is what we’re after!
Cool and Enjoy
Once done, remove them from the oven and cover them with a clean towel to keep them soft while they cool. The steam helps maintain that delightful texture we crave. Once they’re cool enough to handle, they’re ready for filling!
How to Store Pita Bread
Leftover Pita Bread can be a joy to have on hand! Let them cool completely, then store them in a sealed container at room temperature for up to 3 days. If you want to keep them longer, pop them in the freezer where they’ll last about 2-3 months. To enjoy, simply reheat them in a hot oven or toaster for a short while until warmed through.
Tips for Success
- Don’t rush the resting time for the dough; this is crucial for a good rise.
- Ensure your water is lukewarm—not too hot or it’ll kill the yeast!
- Roll the pitas out evenly for a consistent puffing effect.
- Use a pizza stone if you have one for an even better bake!
- Store pitas in a towel immediately after baking to keep them soft.
- Experiment with flavorings in the dough if you’re feeling adventurous!
Serving Suggestions
- Serve with hummus and fresh veggies for a healthy snack.
- Try stuffing them with grilled chicken and salad for a delightful wrap.
- Pair with tzatziki sauce and lamb for a Mediterranean feast.
- Use them to dip into your favorite soups or stews.
- Serve warm as a side with your meal for an inviting touch.
Enjoy this yummy baking venture, and don’t forget to share your delicious results! Happy baking!

Leave a Comment